Bismillah
In this article, we will solve a simple lab challenge that relies entirely on static analysis (Static Analysis). The objective here is to apply the concepts learned previously to decrypt the flag hidden within the program.
Lab environment setup: You may download the executable for this lab from the following link 5t4t1c_cr4ckm3 in the course repository. The archive password is: p01nt
To open this file you must open it inside a VM. Although I am the one who designed this file, never trust the cyber community. We will run the file with the following command
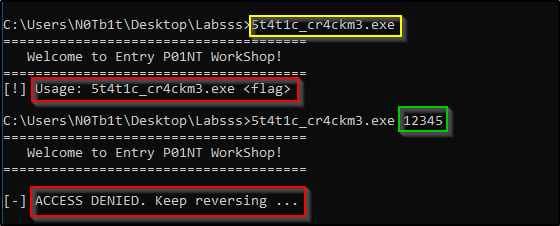 {: .shadow .rounded .mx-auto .d-block}
Figure (1)
{: .shadow .rounded .mx-auto .d-block}
Figure (1)
1. Initial Triage
To begin, we open the program using Detect It Easy (DIE) to identify the program’s architecture, programming language, and whether it is packed or not.
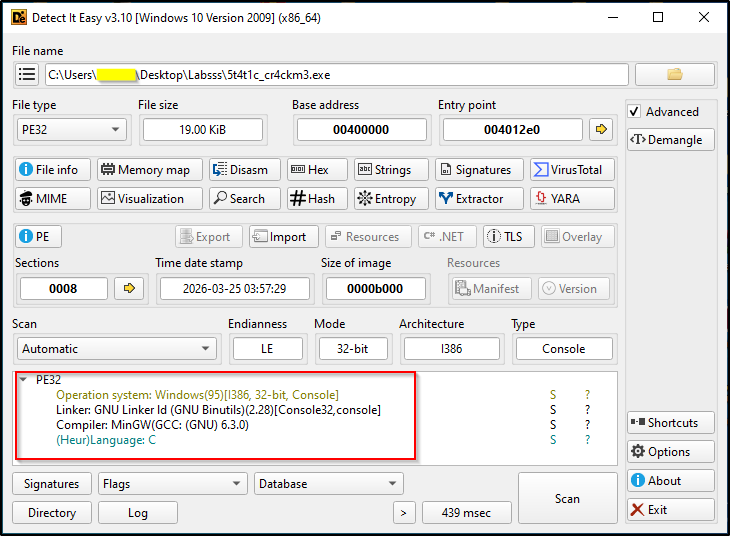 Figure (2)
As seen in the image, the program runs on a 32-bit architecture, was written in the C language, and was compiled using the GCC compiler. The file type is a Windows executable (PE32), and there is no indication of any packer being used.
We then move to PE-Bear to take a quick look at the header sections. After confirming that the program is an EXE, we focus on the Strings and Imports sections with the aim of finding any clear indicator of the Flag.
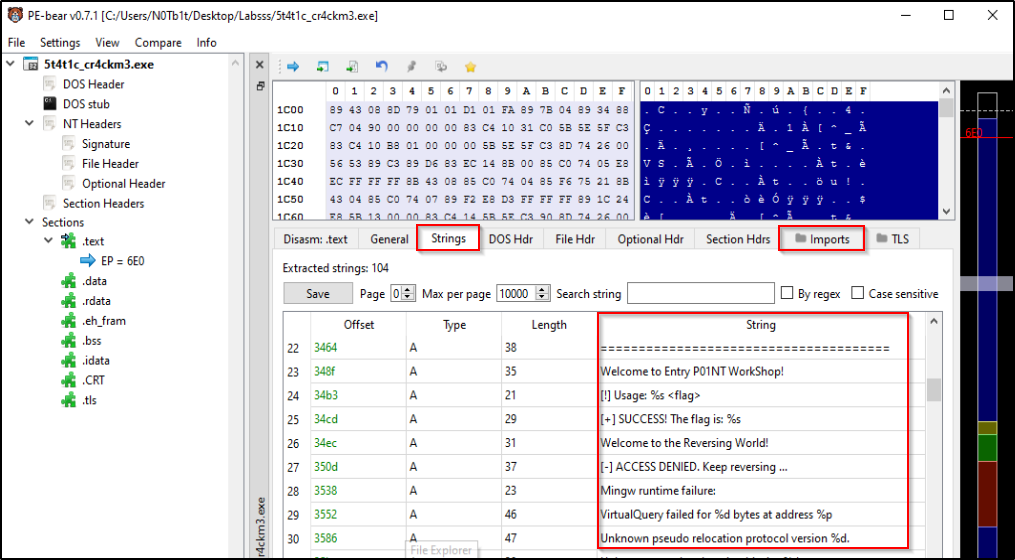 Figure (3)
After searching, we discover that the Flag is not present as plaintext, which means it has been concealed or encrypted (Obfuscation).
2. Analysis Inside IDA Pro
Now we open the executable inside IDA Pro to begin analyzing the code. The program will automatically recognize the file’s architecture and disassemble it.
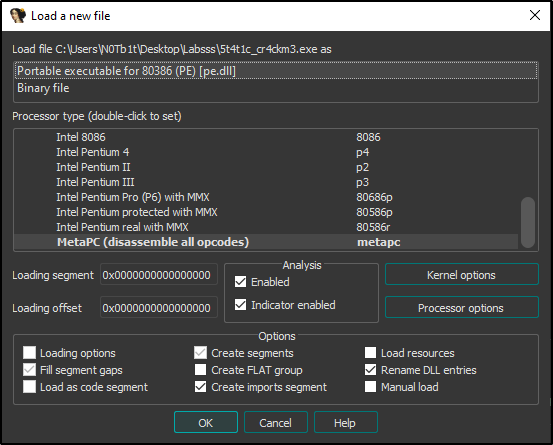 Figure (4)
Extracting Strings
We begin by searching for any interactive messages that help us locate the verification logic. We press the Shift + F12 shortcut to open the Strings Window, and search for the phrase that appears upon entering a correct solution (or the error message).
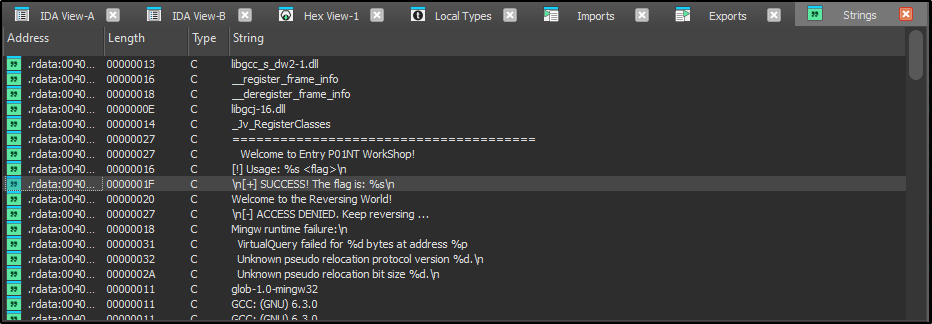 Figure (5)
We double-click on the desired phrase, which takes IDA to the location where this text is stored in the data section (.rdata or .data).
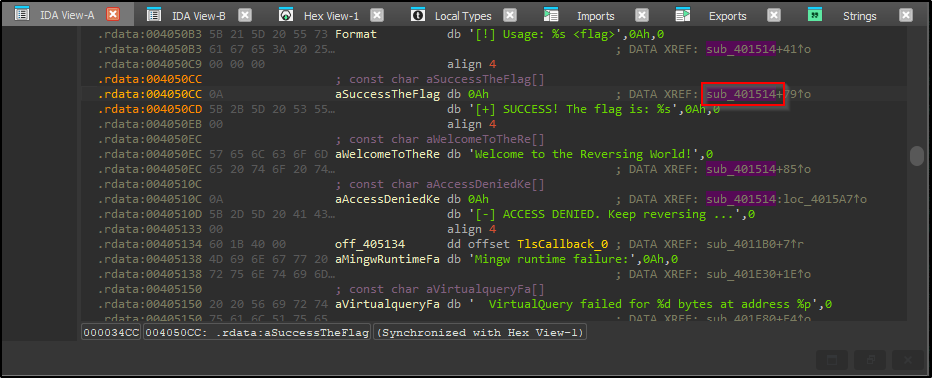 Figure (6)
Cross-References
To determine where this text is used in the code, we click on it, then press the X shortcut (or double-click on the side comment leading to the function). This takes us directly to the function that calls this message.
We are now in Visual Mode. Recall that you can switch between the graph view (Graph View) and the sequential text view (Text View) by pressing the Space button. In our case, we want to remain in Graph View to clearly track the program path and the branches (Branches).
3. Verification Algorithm Analysis
We zoom in on the graph to focus on the basic block that precedes the success message, in an effort to understand the programmatic logic.
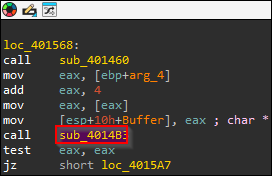 Figure (7)
We double-click the function
A) Length Check
If we focus on the cmp comparison instruction, we notice that it is preceded by a call to the strlen function (which calculates the length of the entered text). The result is compared against the value 0Bh (equivalent to the decimal number 11).
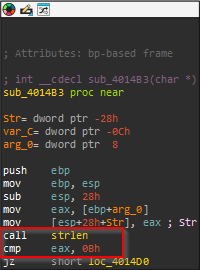 Figure (8)
- First conclusion: The correct Flag must consist of 11 characters.
B) Encryption Loop
We trace the program path to reach the following iteration loop (Loop):
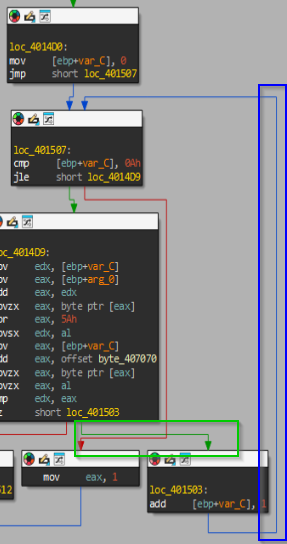 Figure (9)
We clearly observe an xor instruction executed using the constant value 5Ah (or 0x5A).
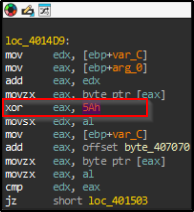 Figure (10)
- Second conclusion: The Flag consists of 11 characters, and was encrypted via a simple
XORoperation using the key0x5A.
C) Extracting the Encrypted Values
To determine the original characters, we must see what is being compared inside the loop.
We observe a cmp instruction comparing two registers: eax and edx.
- The
edxregister holds the characters entered by the user. - The
eaxregister holds the encrypted Flag characters that the program fetches from memory (specifically from the addressbyte_407070).
We single-click on the address byte_407070 and press the X references button.
A references window appears. We inspect the Type column and select the reference carrying the letter w (which denotes Write, i.e., the location where these values are written/stored in memory), then press OK.
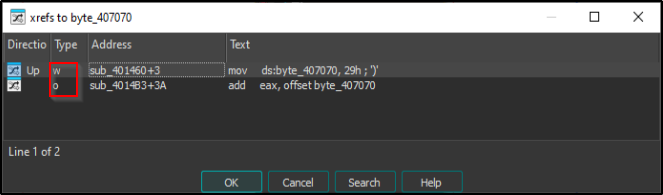 Figure (11)
The encrypted values stored in memory (as a byte array) now appear, and IDA helpfully displays the accompanying comments. The equation is now complete!
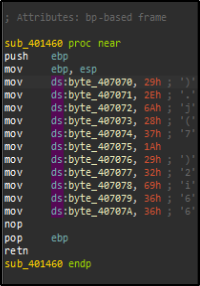 Figure (12)
4. Decryption Script
We now have an array of 11 encrypted characters, and the encryption key is 0x5A. Since the XOR algorithm is reversible (i.e., encrypting the ciphertext with the same key yields the plaintext), we will write a simple Python script to decrypt and extract the Flag.
# The encrypted values array extracted from IDA
encrypted_hex = [0x29, 0x2e, 0x6a, 0x28, 0x37, 0x1a, 0x29, 0x32, 0x69, 0x36, 0x36]

# The encryption key (XOR Key)
key = 0x5A

# Decrypt via a loop that takes each character (byte), applies XOR with the key, then converts it to text
flag = "".join([chr(b ^ key) for b in encrypted_hex])

print(f"The Flag is: {flag}")
When this code is executed, the output will be as follows:
The Flag is: st0rm@sh3ll
5. Verification
To confirm the validity of the solution, we run the program and enter the Flag we obtained:
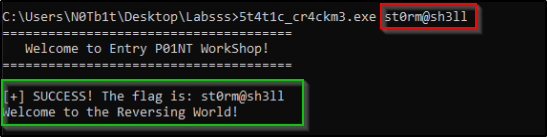 Figure (13)
The success message appears. We have analyzed the file statically, understood the algorithm, and successfully decrypted it!